As an Amazon Associate, I earn from qualifying purchases.
At A Glance Contents Of This Article
Introduction:
LearnDash is a well-known and popular WordPress Learndash LMS (Learning Management System) plugin. It helps you for creating and selling online courses from the Learndash WordPress site easily. LearnDash has a drag and drop course builder which allows to add quizzes, lessons, and assignments for creating courses promptly.
Would you like to create online courses on WordPress? Then, you may take help from the Learndash plugin. Because it helps to make money from the blog site by giving your advice. In this article, we will show you – how you will build and sell online courses using learn dash on WordPress.
How to build and sell online courses using Learndash on WordPress
Before going to read the main topic just have a look at the Learndash pricing packages.
Sometimes the Learndash LMS pricing packages fluctuate depending on its demand. So, to know the updated price packages of the Learndash WordPress plugin, click on the bold texts below:
Updated price packages of LearnDash
What would you need to build and sell an online course?
Following things will be required to commence selling courses online with WordPress-
1.A domain name which will be your web address (example https://onlineearningstrategies.com)
2.A WordPress hosting account where your site will be stored.
3. A learning management plugin or add-on to create and sell courses.
Your online course can be created within an hour on WordPress using this plugin which is really astonishing. We will show you this in this article step by step.
Steps to follow to create online courses with Learndash
Let us start and follow the steps:
Step 1: Setting up WordPress site
There are a lot of website builders in the online world that we can use to build websites. But, most of the mentors recommend WordPress because of its some unique flexible features which give you more freedom so that you can take your site in any direction as per your requirement.
WordPress has two types of platforms named WordPress.com (it is connected with the own server of WordPress). And WordPress.org (it is known as a self-hosted WordPress platform).
Both of these two platforms are playing a vital role in the online world as per the requirements of users. But due to some additional features and facilities of WordPress.org, now a day most of the mentors are recommending the WordPress.org platform. It gives full access to all the features of WordPress which is not possible with WordPress.com.
If you Want to start a self-hosted WordPress.org platform, you have to buy a domain name and WordPress hosting for $14.99/year and $7.99/month respectively. And you will need to buy an SSL certificate for $69.99/year in order to receive online payments. This amount is not small for beginners.
Here, you need to know that Bluehost has come to an agreement with WordPress.Bluehost has agreed to offer all the users of WordPress a free domain name, free SSL certificate. It also has agreed to offer a special discount on hosting packages. It means, all the users of WordPress will get the above package at $2.75/month.
Click here to get your this Exclusive Bluehost offer
Upon purchasing the hosting package, you have to create your website. You should have it created by any developer if you are new in this regard. If your site is ready, then you have to go forward for 2nd step
Step 2: Installing and setting up the Learndash LMS plugin
For WordPress, this tool is considered as the best Learndash LMS WordPress plugin which is an all-in-one complete course management solution with lesson planning, assignments, several quizzes, course development, etc.
Now, we have to install and activate the Learndash LMS plugin. If we show you here- how to install the Learndash LMS plugin, then this article may be a little bit bigger for you. Anything extra larger more than your expectation may break your attention. So, to know – ‘how to install WordPress plugin’, you may take help from YouTube. Because a lot of videos are available on Learndash youtube in this regard.
Or
Have a look at the video – how to use Learndash
You can read our another article titled “Installing process of WordPress Plugin in the easiest way”
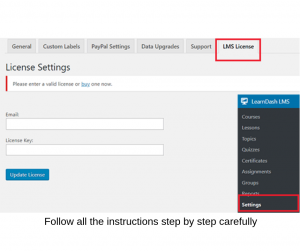
Upon activation of this plugin, you have to visit the LMS Learndash >> Settings page and click the LMS License tab in order to enter your email address and license key. After entering all the information, click the ‘Update License’ button for storing your settings.
Now, you have to switch to the ‘PayPal Setting’ tab. Here you will have to give your PayPal information to receive online payments from your users.
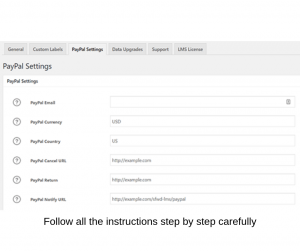
Remember, never forget to click the “Save” button to store your setting.
It also allows you to install Stripe and 2Checkout payment gateways as Add-ons if you don’t like to use PayPal.
If your payment settings have been configured successfully, then your learn dash LMS plugin is ready to create courses.
Step 3: Start creating your first course
In this stage, you have to visit learn dash LMS » Courses page and click the ‘Add New’ button.
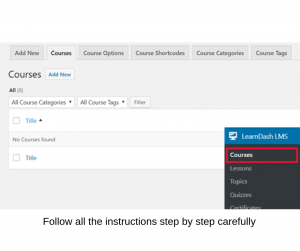
This will take you to the ‘Add New Course’ screen. First of all, to create a course, you will need to add a title for it (course) and then add a description in detail. You can include course categories and featured images as a thumbnail as well.
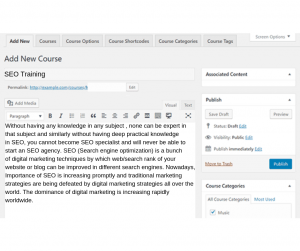
Now, you can see a course description and course option box below where different options like course price, type of course (open, free, closed, buy now or recurring), etc can be set.
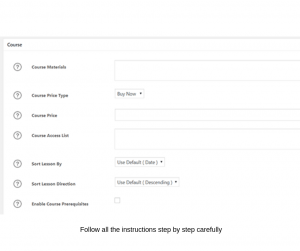
Upon setting courses options, you need to click the save or publish button in order to make your courses open publicly. You can also click the preview button just to see how your courses look like before publishing.

Note: ‘Take This Course’ button can be seen if you are watching the course page in “logged in” condition as an administrator in WordPress. In this situation, you may open an incognito browser window or log out to see the course page as a preview.
Step 4: Include lessons in your course for your learners
The first course that you have created now to be added to the online course. It helps to create lessons and then to include those in online courses. To add lessons to your course, you have to visit the learn dash LMS » Lessons page and then click the “Add New” button at the top of the page.
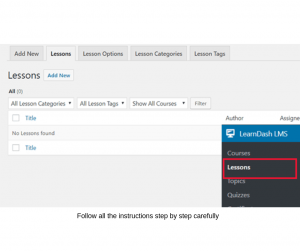
Now, first of all, what you have to do is – to create a title for your lesson and then to start creating lesson content. Here, you can add text, images, embed videos, and many more.
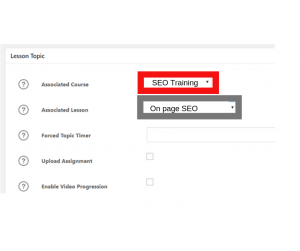
The lesson editor box is given below where you will get lesson options. And you can add your lessons to the course by selecting your course that you created earlier from the “Associate Course” drop-down box.
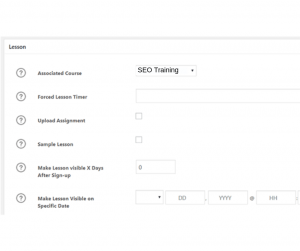
From these options, you can also choose lesson timer, lesson progression, and submission of assignments, and many more if your lesson requires.
When you think that your lesson is created properly then you can click the button named “Publish” to save. And now you can publish your created lesson. And now you can see the lesson on the course page below automatically. In order to include more lesson to your course, you may repeat this process again and again. You may break down an individual lesson into topics as well. To do it, just visit the page named learn dash LMS » Topics and click the ‘Add new’ button to include a topic. The process of creating a topic is similar to the process of creating a lesson. Instead of including it in a course, just you need to include it in a lesson.
Step 5: Including quizzes and assignments in your online course
It has come with well-equipped dynamic quizzes and assignments which helps you to make your online course more dynamic and easy to understand and engaging for your all students. Here you can make quizzes and assignments as per the requirement of your students for their next course or lesson. Here you are able to review the assignment and give them (your students) feedback as well.
Making Quizzes in learn dash
In order to add quizzes, you have to visit the learn dash » Quizzes page and click the button named ‘Add New’.
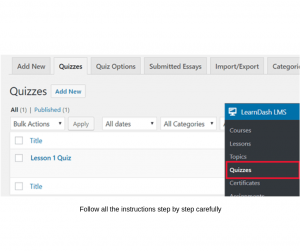
Here, first of all, you have to create a title and description for your quiz and then you have to scroll down to a box named ‘Quiz’ and include your quiz in the course, lesson, or topic.
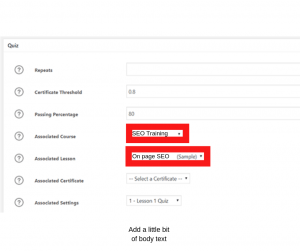
The default quiz setting is workable for most cases, but you can customize the setting as per your requirement from the advanced quiz setting options.
Upon customization of settings, you need to click the save or publish button to save the quiz. And then you would notice a new option where you will be able to add questions to your quiz. Here, you need to click the tab named “Questions” and then you have to click the button named “Add Question”.
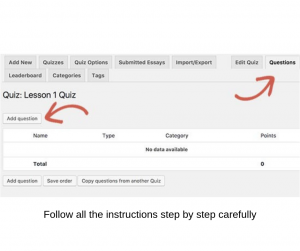
It will take you to the “Add new question” screen where you can create several types of questions like multiple-choice, true or false, free choice, fill in the blanks, essay, and so on.
You should include multiple answers to the question and include the correct answer as well. And you should also choose a message to show for correct or incorrect answers and many more.
Before going to the next section, never forget to click the save button. Your quiz will appear on-topic, lesson, or on the course page as per your settings.
Scope of adding assignments in LearnDash
Here, you will get the scope to add assignments by editing lessons and by going to the lesson options where you have to check the box named “Upload Assignment” to upload the assignment options.
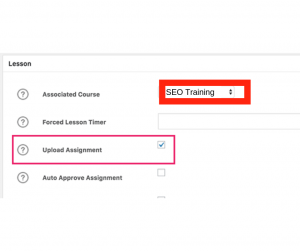
After completion of all the above tasks, assignment instruction can be provided in your lesson. At the bottom of the option, users will be able to see an option named “Upload Assignment” to upload their assignments.
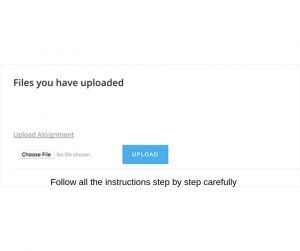
Upon uploading the assignments by users, you will be able to see those if you visit learn dash LMS » Assignments page.
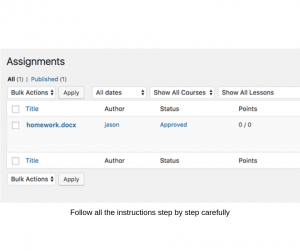
Here, you will be able to edit and approve the assignment. And you can also give your feedback on their submitted assignments.
Step 6: Upon completion of course, giving certificates (learndash certificates)
Upon completion of each course, this tool allows you to give certificates to your successful students. In order to create a certificate in LearnDash, you should have some basic knowledge on HTML. To achieve this goal, first of all, you will need a background image file of the certificate which will be used for your certificate.
Certificate templates can be found on free images creating websites like Canva. If you find a template from these free image creating websites as per your expectation, then that you have to do is – just delete all texts form it carefully and then download it to any PC or laptop. Besides, this learndash certificates can be customized any time. For this reason, the popularity of this certificates is increasing rapidly worldwide.

Next, you have to visit the learn dash LMS » Certificates page and then click the button named “Add New”.
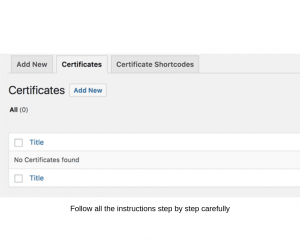
Now, you have to set the certificate background image on the Add New certificate screen as featured image and in order to reload the page, click the Save Button.
Now, your certificate template can be seen in the background of the visual editor. And now, you will be able to start adding text to the certificate template as per your requirements which you want to display on the certificate for your students.
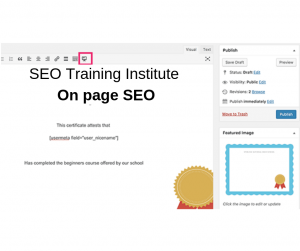
In order to insert the student’s name in the certificate, just click the learn dash icon in the editor. If you think that the certificate is completed as per your expectation, then it is ready to be published.
Next, you have to edit the quiz that was added to your course lesson earlier. You need to add the certificate to the end of the quiz in the Quiz options box.
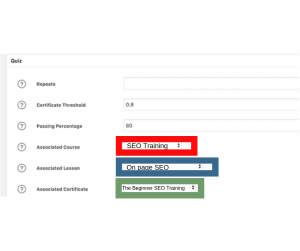
Now, your quiz settings can be saved.
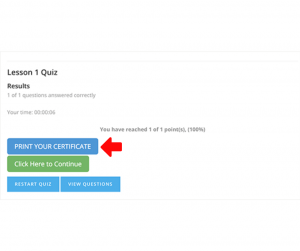
Only the students who will complete the course and pass the quiz successfully will see this option to print their certificate.
I hope that – if you read this learndash review article carefully, then you will be able to create an online course successfully with WordPress using LearnDash. If you like this learndash review article, then share it on different social media. And if you have any questions in this regard, don’t hesitate to ask me. I will try to give you an answer later on. Thanks a lot for reading this article with patience.
If you want to know more in this regard, click here.
As an Amazon Associate, I earn from qualifying purchases.

