As an Amazon Associate, I earn from qualifying purchases.
At A Glance Contents Of This Article
Introduction
NINJA FORMS is considered as the best and most popular free ninja contact form plugins. And NINJA FORMS also offers a paid version for serious users. Every website needs a contact form that helps your visitors to be confident on your site and it is the easiest way to get in touch with your website and you as well. If you display your email address on your site instead of using the professional contact form, then your site will not look professional and nice as well.
Since unexpectedly WordPress is not offering any form builder, the owners of the websites always have to collect this type of plugin (ninja forms WordPress plugin) from any site else. NINJA FORMS helps to create contact forms and other different forms.
With ninja forms those forms can be created are mentioned below:
1.Order forms:
Ninja form allows to create order forms to sell your products or services online and get paid in advance.
2. “Request a Quote” forms:
Usually, Request a Quote” forms are created with the help of ninja forms just to ask for some information that the owners of the sites need to give the clients a quote or estimate for work as per their (clients) expectations.
3.Subscription forms:
You can create a Subscription form just to get the email address of possible customers of the future so that you can send promotional emails to them (the users who have filled up the Subscription forms providing their email address).
4. Survey form:
In order to conduct several surveys on different affairs, you can create this Survey form.
5. Post submission forms:
You can build the Post submission forms only to allow your visitors to add their blog posts to your site and also allow them to edit their previously added posts.
Ninja Forms is a well-known free contact form application or plugin built and maintained by WP Ninjas. You may purchase this plugin separately. It means you can purchase ninja forms add ons separately as per your requirement. If you like to use one or two add-ons only, then you don’t have to buy the whole costly bundle.
ninja forms free version is available to download from WordPress.org. By this time more than one million websites have installed this plugin worldwide.
Ninja forms pricing
At present ninja forms are offering four different price packages. Since these price packages fluctuate now and then, click the texts below to know the updated Ninja forms pricing.
Updated price packages of Ninja Forms
How to Set Up First Ninja Form?
In order to set up your first Ninja Form, just download the plugin as free from the WordPress.org directory and then you have to install and activate it.
Step 1: Building your Form
Upon installation and activation of the ninja forms plugin, you have to visit the Forms » Add New page and here you will be able to see a form builder which will look like the screenshot below. On the left of the column, you will find a few numbers of buttons. Here, you are allowed to click those fields to add to your form.
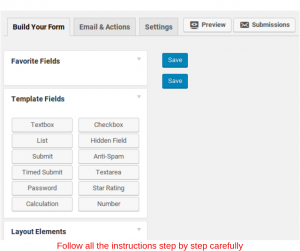
In order to create a contact form, we will need to add fields for the user’s name, user’s email address, and user’s message.
Now, click on the “First Name” under the tab named “User Information”.
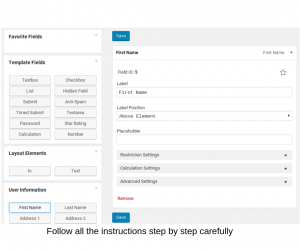
Here, anyone can customize the field’s label and placeholder text. In order to add custom CSS classes, validate the field input, and many more, it allows you also to set advanced options.
To close the options, you may click on the arrow at the top.
Click on the button named Textarea for the message field. And then, let the label be changed to “Message”.
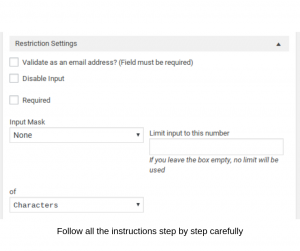
Under the Restriction Settings, be careful to check the “Required” checkbox.
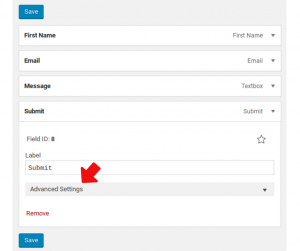
Always be careful to add a Submit button to the form. You will find it on the left of the Template Fields box. You should know that ninja forms cannot add a submit button automatically.
Upon finishing the selecting fields, you have to click one of the blue Save buttons at the bottom or top of the form.
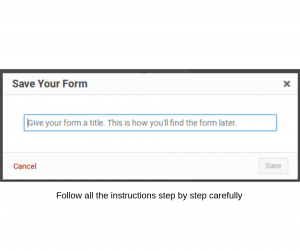
Now, you have to type a name for your form in the popup.
Step -2: Adding Notifications
Whenever someone will fill out a form, then you have to make sure that message can be sent to your email address successfully. That is why now you have to click the tab named Email & Actions and then you have to click on Add New.
This form may be a little bit difficult for beginners. For this reason, ‘how does it work’ has been mentioned below:
Under the field named “Action Name”-Just type something as your internal reference, such as “Email Me” or “Email the Team Leader”
Under the field named “Type”, select the “Email” option. You would notice that now, you are also able to add actions to redirect users or show a success message.
Click the Form Name field and your form fields will appear as options. And now, you need to select the “Name” field that you created.
Now, select the email form field from “Form Address” field which will help you to set it so that messages can be sent from the user’s email address.
Here, you need to enter your email address (and or whom you want to notify) under the field named “TO”
Now, email the subject line to be typed.
In the Email Message field, you will find a button named Insert All Fields. You have to click this Insert All Fields to include all the information and message of users in the email notification that you will receive. You have to be sure about including the message field otherwise you will receive blank notification.
Click on the SAVE button to set up your notification.
Step 3: Adding confirmation for the users
Whenever you will submit a form then the uses can see a blank screen by default.
You will need to add an action to show a successful message or to redirect this message to a specific page.
In order to do that go again to the tab named Email & Actions and click again on the Add New button.
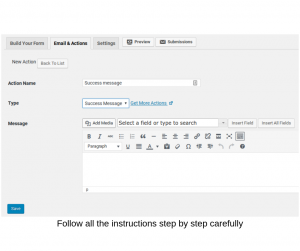
Now you have to name your action and select “Success Message” under “Type”
And now you will need to type the message that you want to show in the Message field below.
Step 4: publishing your Form
You need the shortcode in order to publish your form. Now visit the Forms » All Forms page and you will be able to see the form that you created a while ago.
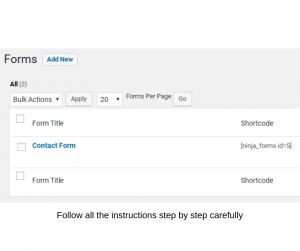
Now, you need to copy the shortcode and paste it on the page or post where you want to show or display your form.
Finally, you need to test the form whether it is working properly as per your expectation.
Note: To read our another article, click on this title below :
About WPForms what you never knew before
Opportunity to extend your options with Add-ons
It should be mentioned here that a free plugin always allows to create basic forms, but if you want to create something complicated then you have to purchase add-ons that have a lot of positive advanced features.
Premium add-on plugins with advanced features allow to:
- Include different advanced options in your form such as file uploads, ninja forms conditional logic, and multi-page forms.
- Get several email newsletters services like MailChimp, AWeber, Campaign Monitor, and many more
- Receive payment with Freshbooks, Paypal, Stripe, etc.
- Follow the leads and convert them into sales with Insightly integration or Zoho, Batchbook.
- Make your business automatic with webhooks, WebMerge, Zapier, etc.
If you buy any plugin separately, you will not get any discount. But, if you buy a bundle package, then you will get discount on each sale.
Pros and cons of NINJA FORMS
Pros
Some benefits of NINJA FORMS are mentioned below-
1.Free:
The plugin with basic features is ninja forms layout and styles free always. If you want to buy a plugin with advanced features, then you have to buy a pro version.
2. Easy to use:
Due to its drag and drop builder feature, it is very easy to use.
3. Flexibility:
You may enhance your contact form with premium add-ons without purchasing an expensive bundle. It means you can buy add-ons separately as per your needs.
Cons
Some disadvantages of Ninja Forms are mentioned below-
1. Expensive:
Ninja forms pro version of Ninja Forms is a little bit expensive.
I hope that by reading this review article on Ninja Forms, you all will be benefited and will get a clear idea about this plugin. If you have any questions in this regard, don’t hesitate to ask me. I will try to give the answer at our convenient time.
As an Amazon Associate, I earn from qualifying purchases.

